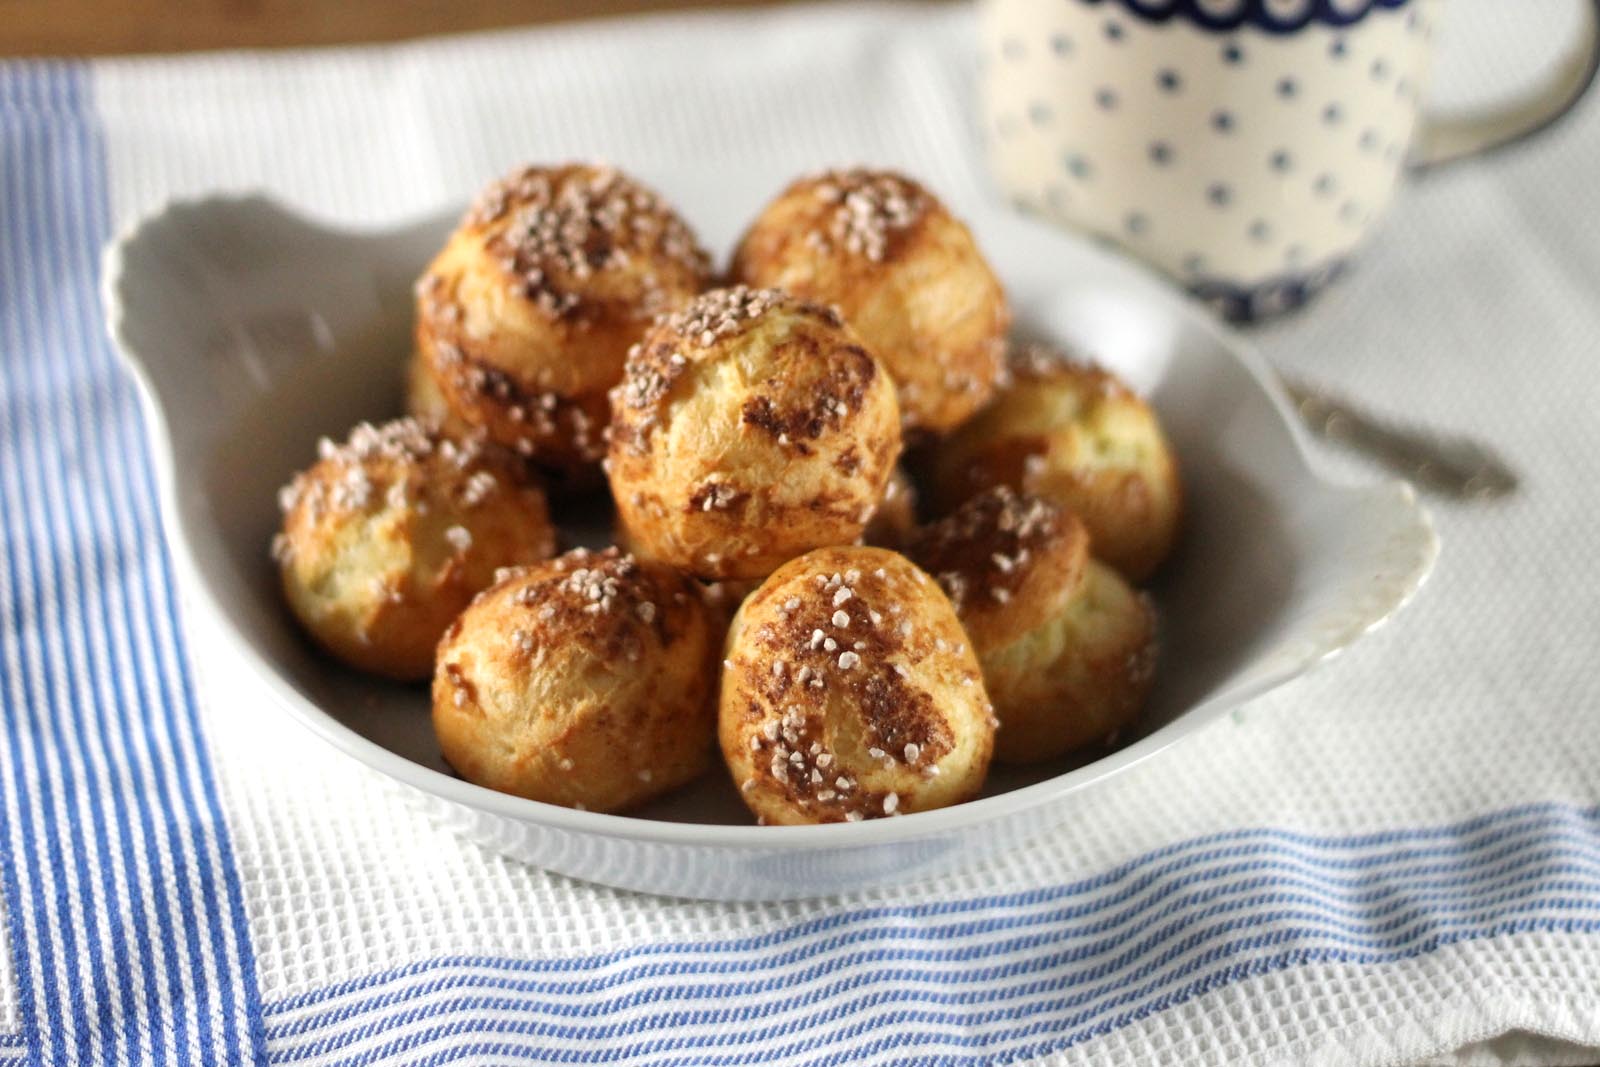
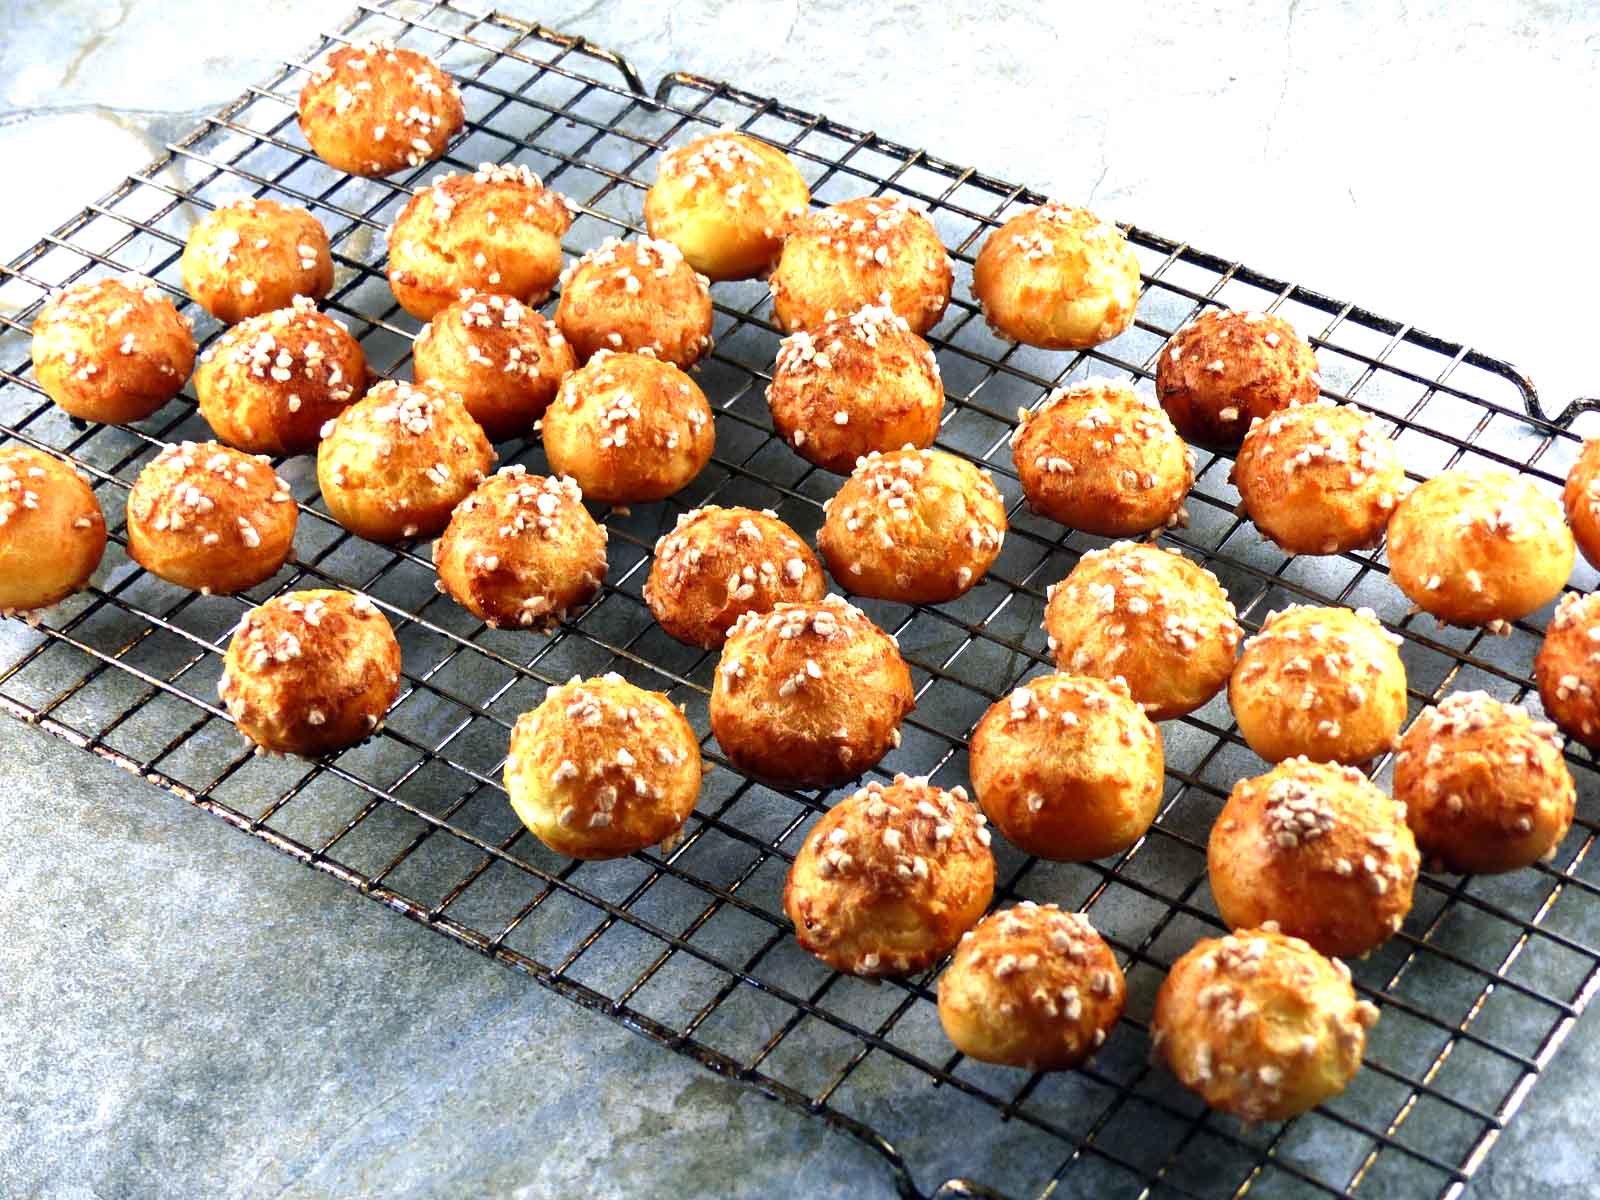
Made with choux pastry (pâte à choux), chouquettes are tiny unfilled cream puffs. They are essentially a savory cousin of cheesy gougères, which we have featured previously. Pearl sugar, spiked with a whisper of cinnamon, gives these treats an appealing crunchy finish and eliminates the need for a filling. They make an irresistible snack or accompaniment to afternoon tea.
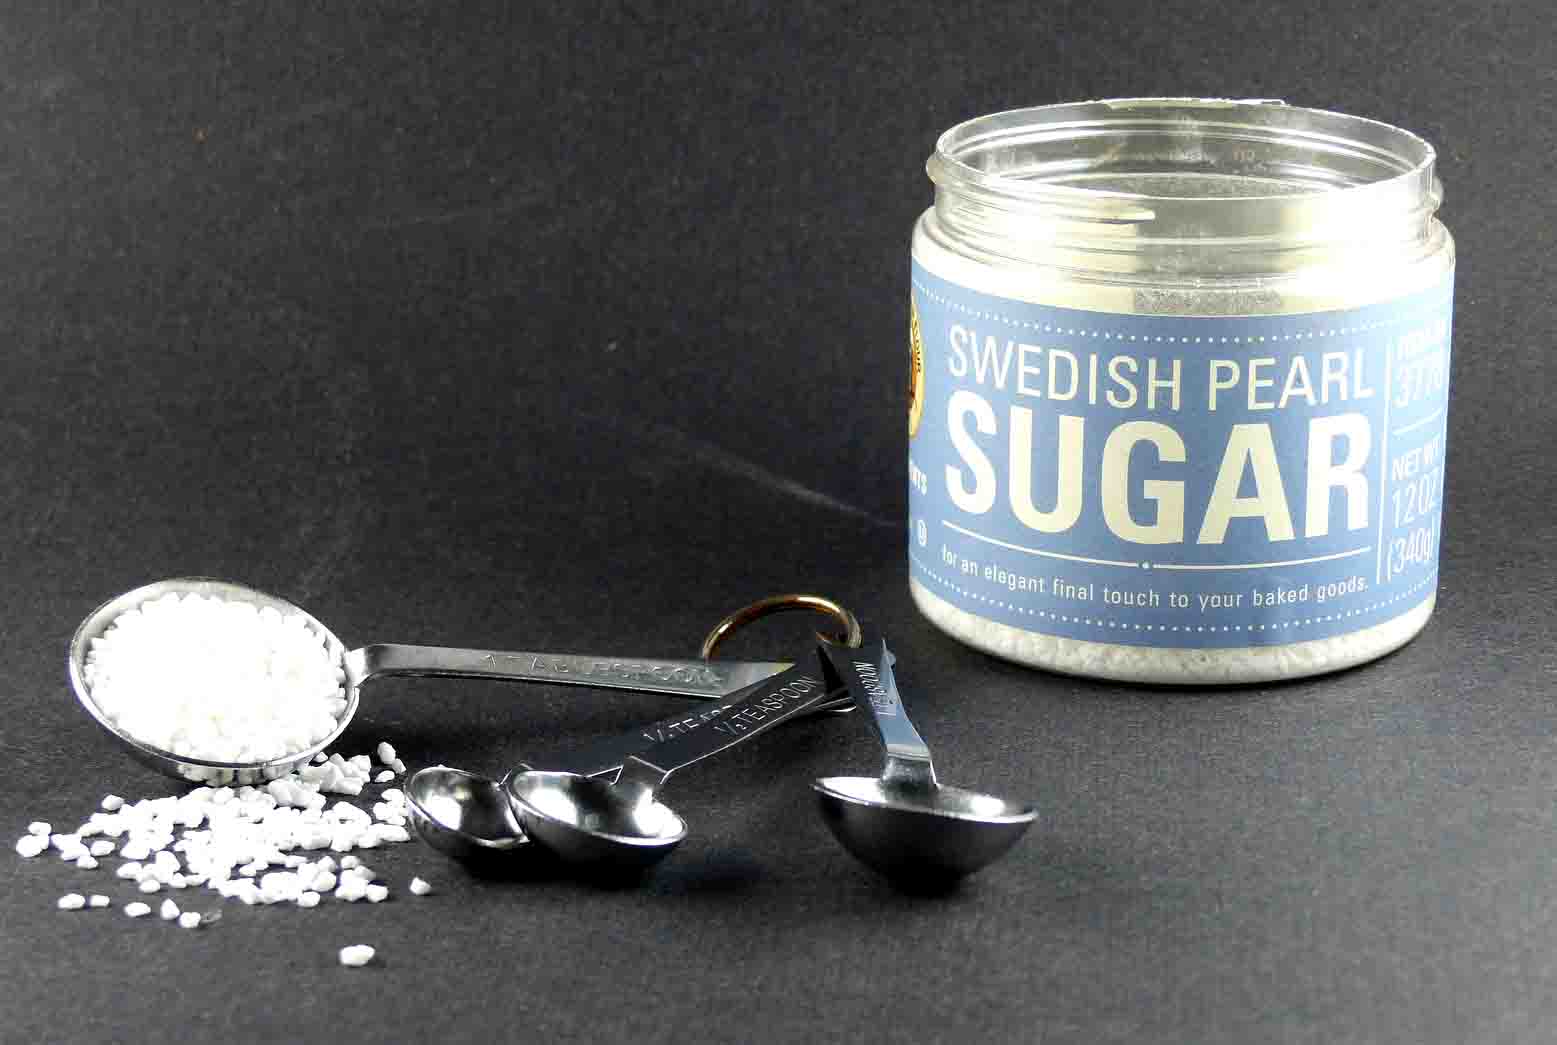
Pearl sugar, a type of finishing sugar, is an essential ingredient for making chouquettes. During processing, the sugar is compressed into small round pieces and polished to achieve a pearl-like finish. Its advantage over regular granulated sugar is that it will not melt when subjected to the heat of the oven, creating a crispy texture for baked goods. There are two types of pearl sugar. The granules of Swedish pearl sugar are smaller than those of Belgian pearl sugar. For this recipe, opt for the Swedish variety; the smaller granules are better suited to these small pastries. Pearl sugar can be found at King Arthur Flour and, of course, on Amazon.
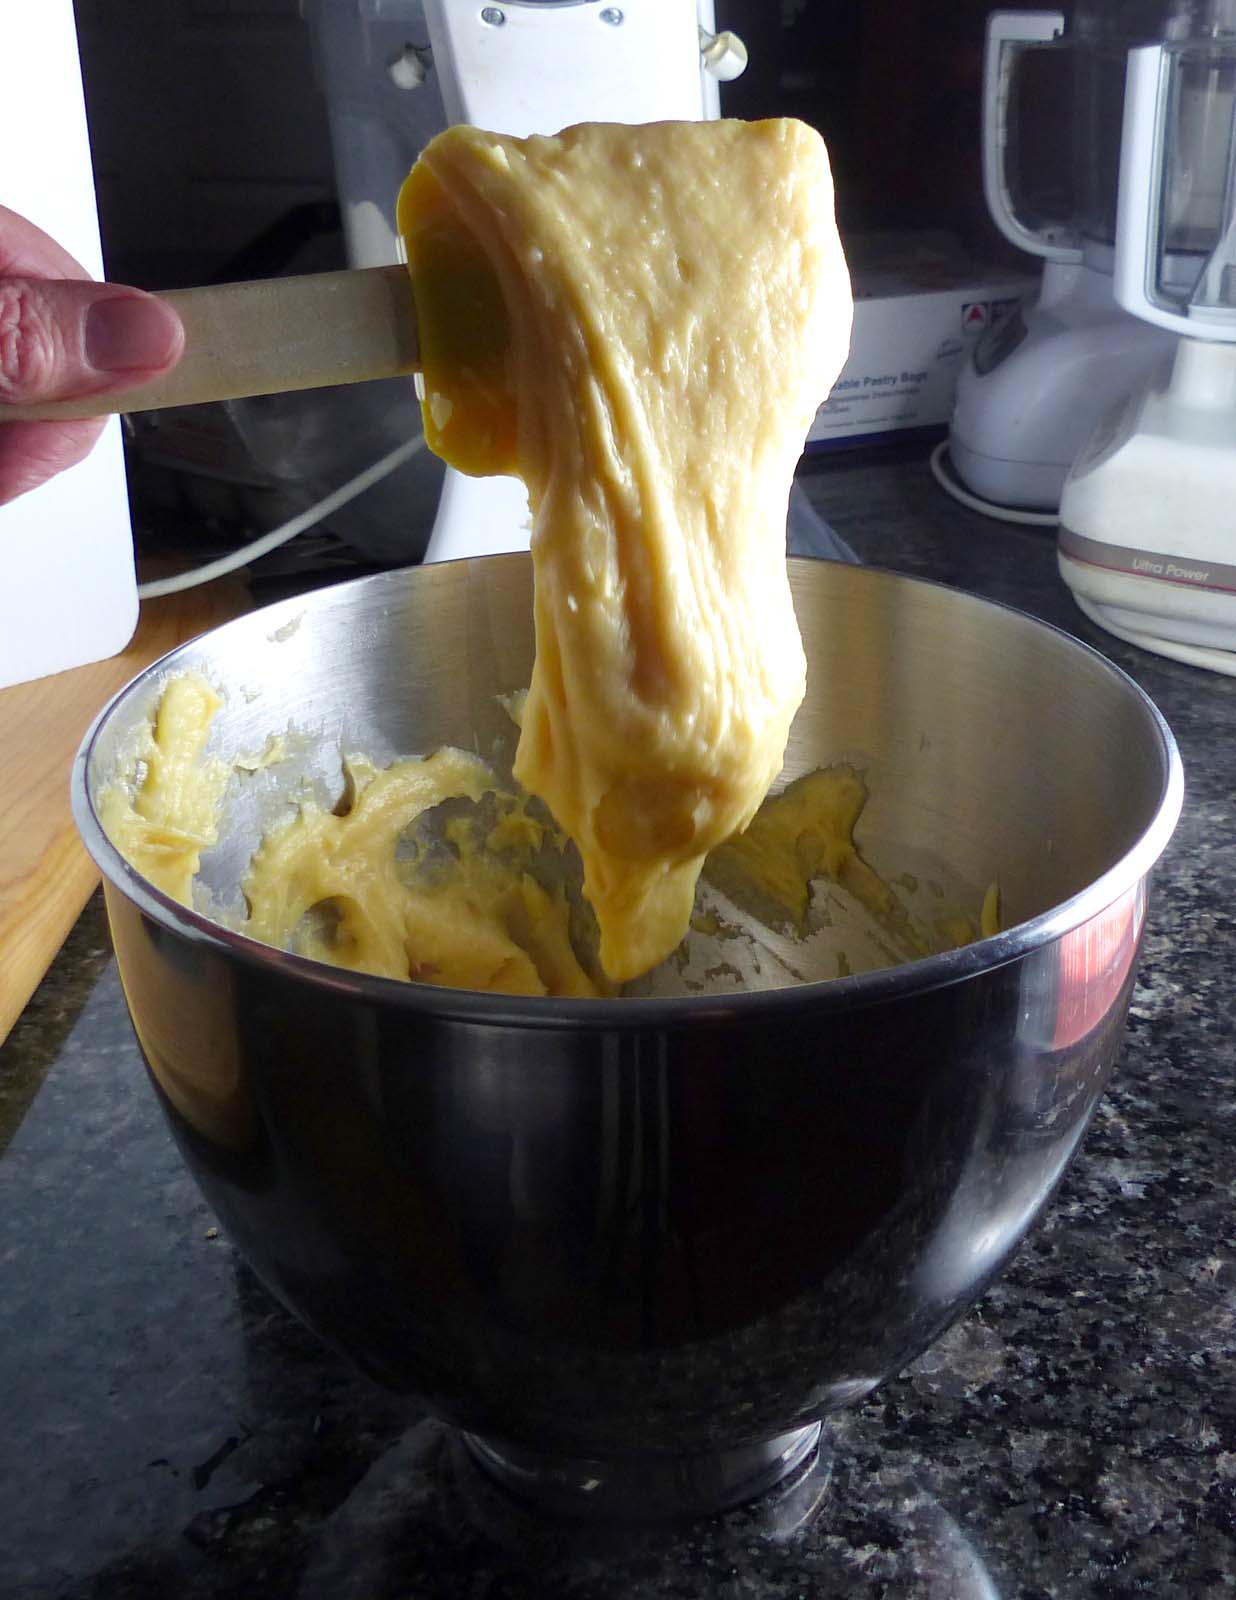
Easy and extremely versatile, choux pastry is a cooked pastry. To make it, you bring water and butter to a boil in a saucepan. Stir in flour to create a stiff dough. Then you beat in eggs to make firm dough that is soft enough to flow from a lifted spoon. A stand mixer is helpful for this step, but a food processor or a strong arm also works. Pipe or scoop the dough onto baking sheets and bake. Timing is important in the process and things move quickly, so be sure to have all your ingredients measured and equipment ready before you start cooking.
One of my favorite things about this recipe is the make-ahead convenience. After shaping the mounds of dough, you can freeze them until firm, then transfer them to a plastic food bag and store them in the freezer. At a moment’s notice, you can pop the chouquettes into the oven and enjoy a special treat that will transport you to a Parisian bakery.
Happy baking!
Equipment: baking sheets; parchment paper; stand mixer, fitted with paddle attachment, or food processor (optional); piping bag or cookie scoop; pastry brush.
Ingredients
¾ cup all-purpose flour
¾ cup plus 1 tablespoon water, divided
6 tablespoons (3 ounces) butter, cut into pieces
2 tablespoons granulated sugar
⅛ teaspoon fine salt
3 large eggs, plus 1 egg for glaze
¼ cup Swedish pearl sugar
½ teaspoon ground cinnamon
Preparation
1. Preheat oven to 425ºF. Line 2 or 3 baking sheets with parchment paper. Place the measured flour beside the stove. Place ¾ cup water, butter, granulated sugar, and salt in a small saucepan. Bring to a full boil over medium-high heat, stirring to melt the butter. Remove from the heat. Add the flour all at once. Stir with a wooden spoon until the mixture comes together and forms a ball. Return the pan to medium heat and cook, stirring, for 2 minutes to dry the mixture slightly. Let cool for 2 to 3 minutes.
2. Transfer the dough to the bowl of a stand mixer fitted with paddle attachment or a food processor fitted with metal chopping blade. (If you don’t have a mixer or food processor, you can leave the dough in the saucepan and beat in the eggs by hand.) Crack 3 eggs into a measuring cup and blend with a fork. With the mixer at medium speed, add one third of the eggs; beat until incorporated. Repeat with the second third of the eggs and then with remaining eggs, making sure that the eggs are incorporated before adding more. Test the consistency of the dough by lifting a large spoonful of dough. It should flow slowly from the spoon. If it is too stiff to flow from the spoon, add a little of the remaining egg that has been reserved for glaze.
3. Spoon the dough into a piping bag fitted with a ¼-inch plain tip or a plastic food bag. (Cut a ¼-inch opening in one corner of food bag.) Pipe mounds, about 1 inch in diameter and well-spaced, onto the prepared baking sheets. (Alternatively, use 2 teaspoons or a cookie scoop to shape the mounds.) Using a moistened fingertip, flatten the pointed tips. Blend the remaining egg with the remaining 1 tablespoon water in a small bowl. Using a pastry brush, brush the mounds with the beaten egg.
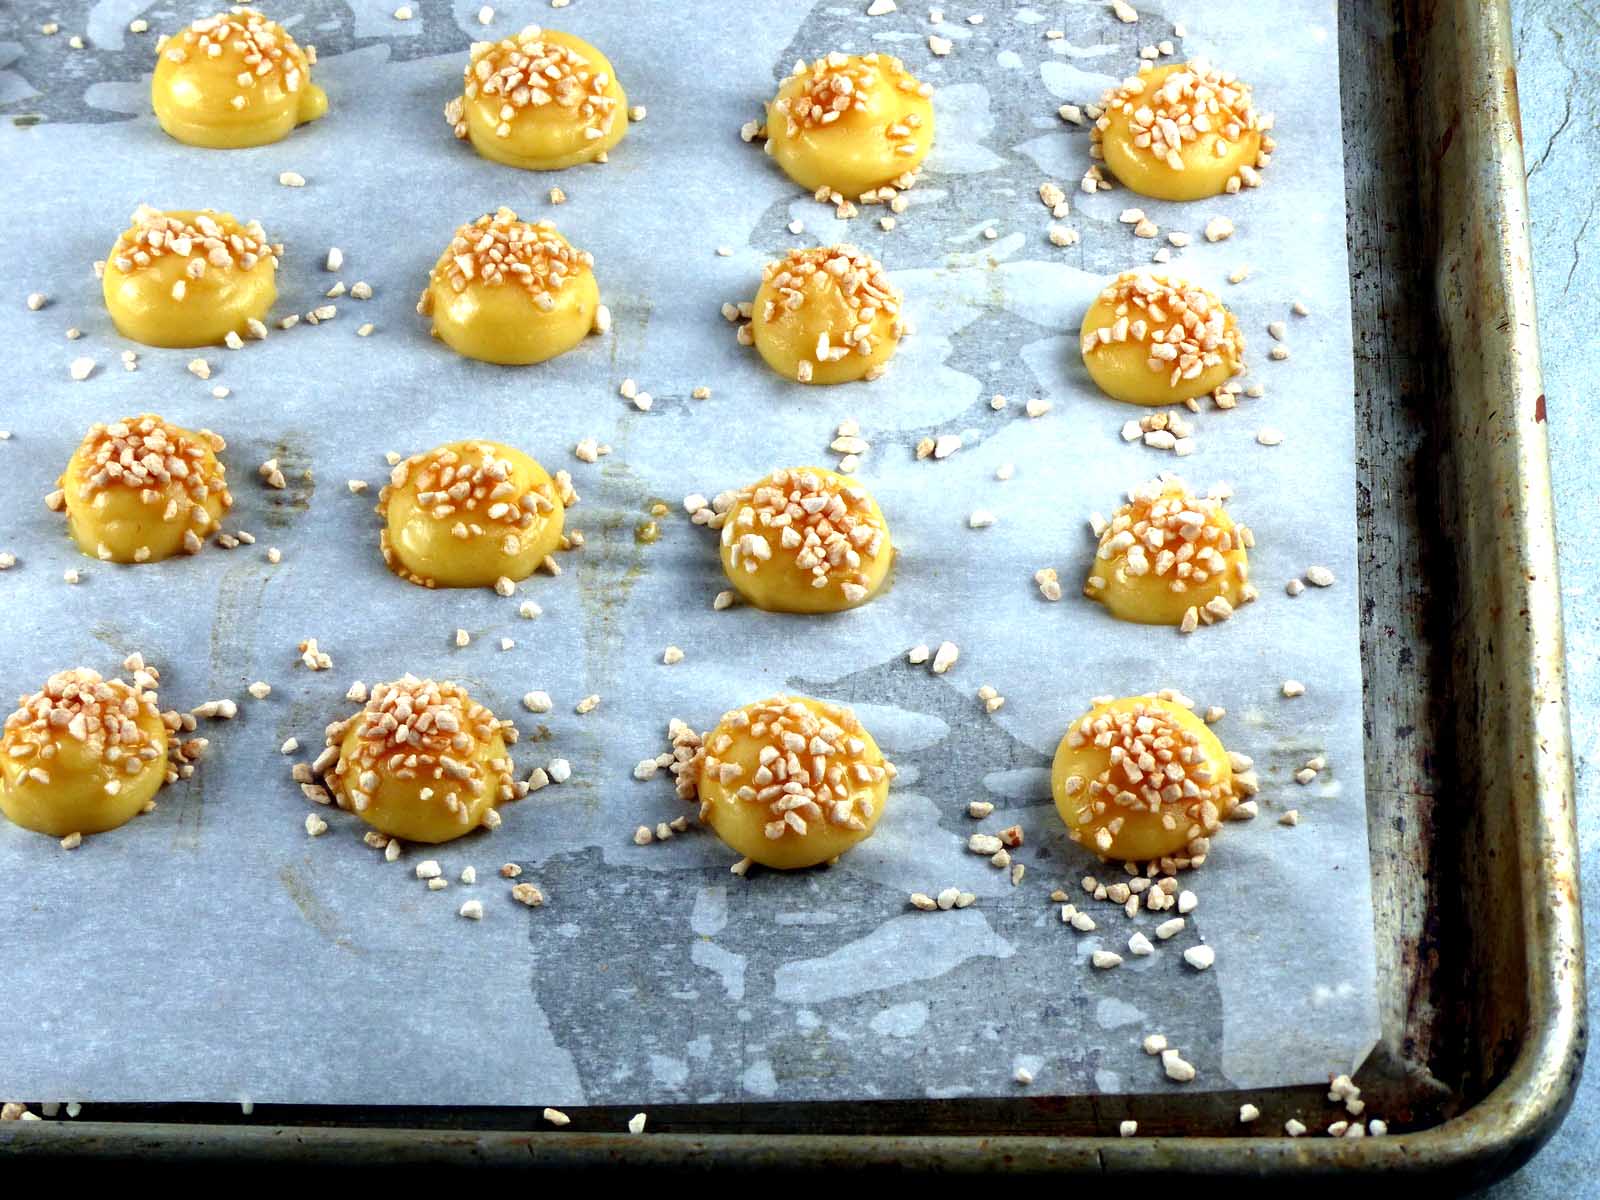
4. Mix the pearl sugar and cinnamon in a small bowl. Sprinkle the pearl sugar mixture generously over the mounds. (You can cover the unbaked chouquettes and place them in the freezer until firm. Transfer them to a food storage bag, close the bag tightly, and freeze for up to 3 months. When you are ready to bake, arrange the chouquettes on a parchment-lined baking sheet. Do not thaw before baking.)
4. Bake the chouquettes, one sheet at a time, for 10 minutes. Reduce the oven temperature to 400ºF and bake until puffed, golden brown, and crisp, 12 to 15 minutes longer. (If you are using frozen dough, the baking time may be longer.) Pierce the side of each chouquette with the tip of a sharp knife to release steam while they are still warm. Let them cool completely on a rack. (The bottoms may become a little dark because of the sugar caramelizing on the parchment paper, but it’s easy to scrape off any darks bits with a small sharp knife.)
Chouquettes are best enjoyed shortly after baking, but you can freeze leftover baked chouquettes in an airtight container for up to 1 month. As they are filled with air, the frozen chouquettes thaw quickly; place them on a baking sheet and bake at 350ºF for about 5 minutes.
Yield: About 6½ dozen chouquettes. (I bet you can’t eat just one.😊)
Patsy Jamieson